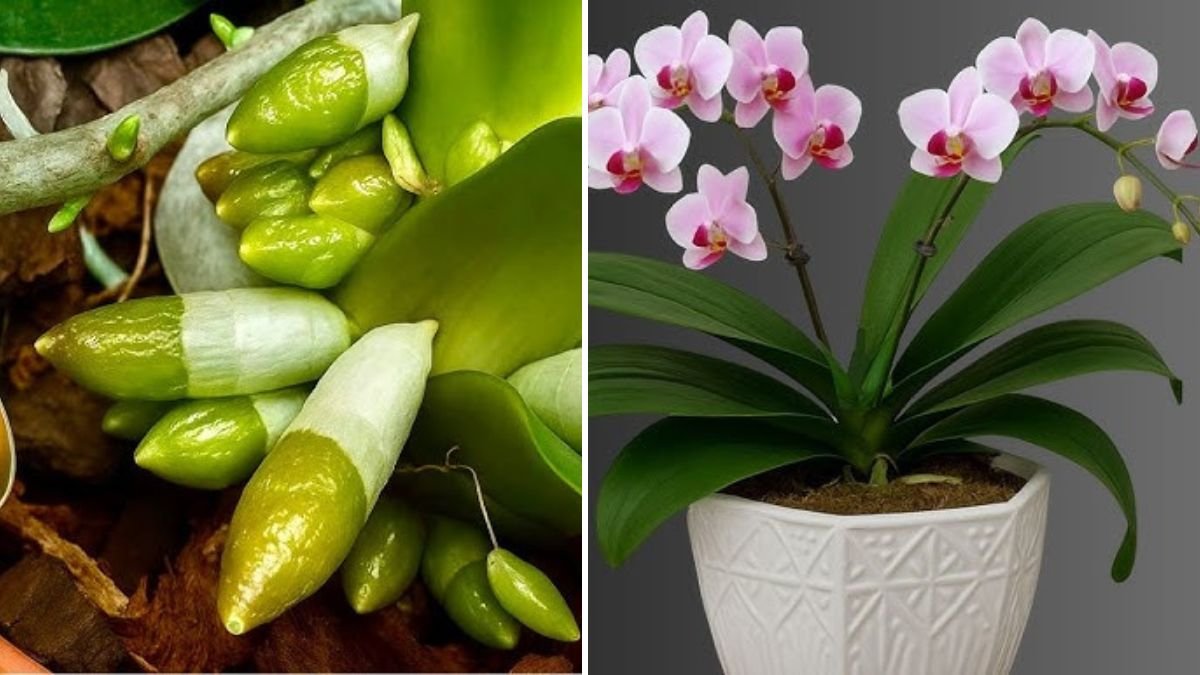
Orchids are truly the crown jewels of indoor plants. Their elegant flowers, vibrant colors, and exotic appearance make them a favorite for homes, offices, and gardens alike. Yet, many orchid enthusiasts struggle with one recurring problem: maintaining healthy roots and consistent blooming.
What if I told you that the secret to thriving orchids doesn’t require expensive fertilizers or complicated care routines? In fact, all it takes is just one spoonful of a simple natural ingredient every week. This easy trick can help your orchid produce new roots, develop stronger leaves, and bloom continuously throughout the year.
In this guide, we’ll reveal the simple yet powerful method, explain why it works, and provide a comprehensive care routine to ensure your orchids thrive like never before.
Why Orchid Roots and Flowers Depend on Nutrition
Before diving into the method, it’s important to understand why roots and flowers are so critical to orchid health.
The Role of Roots
- Water Absorption: Orchid roots absorb water and essential minerals from their medium.
- Nutrient Uptake: Strong roots ensure your orchid receives the nutrients needed for growth and flowering.
- Energy Storage: Many orchids store energy in their roots to support blooming cycles.
The Role of Nutrition
- Orchids require nutrients to grow roots, leaves, and flowers.
- Natural sugars and minerals can stimulate rapid root formation and year-round flowering.
By providing the right nutrients in small amounts consistently, orchids can thrive and maintain vibrant blooms even outside their usual flowering season.
The Secret Ingredient: 1 Spoon a Week
The simple trick that transforms your orchid’s growth is surprisingly accessible: rice. Yes, the staple you find in every kitchen. Rice contains natural starches, carbohydrates, and trace minerals that promote healthy root growth and energy production for flowers.
Why It Works
- Stimulates Root Growth: Starches provide energy to new root cells, helping them grow faster.
- Strengthens Leaves: Healthy roots and nutrients lead to thicker, greener, and stronger leaves.
- Encourages Continuous Blooming: Energy from rice fuels flower development throughout the year.
- Natural and Safe: Unlike chemical fertilizers, rice is organic and gentle on orchids.
💡 Pro Tip: Use only plain rice without salt or additives to avoid harming your plant.
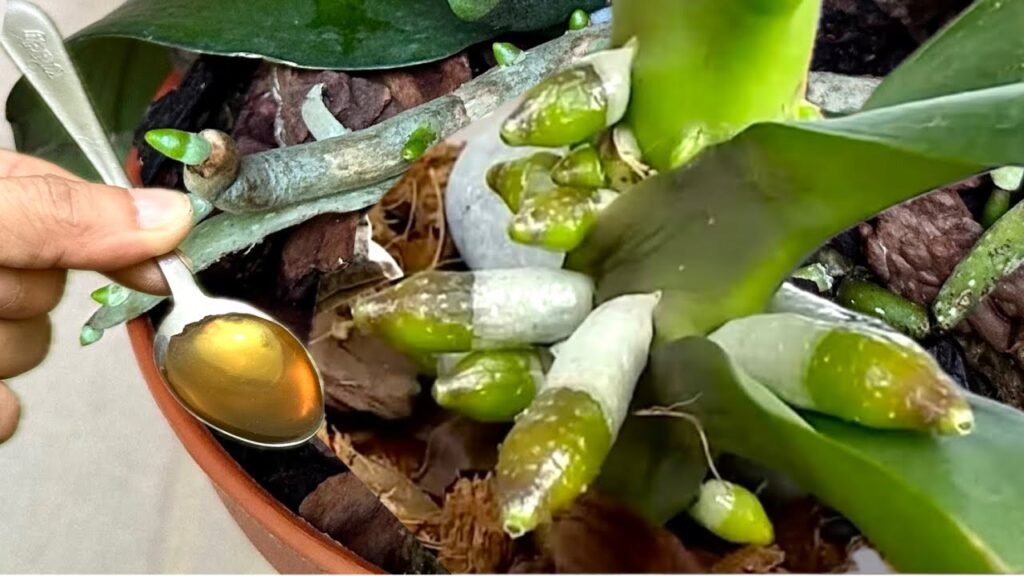
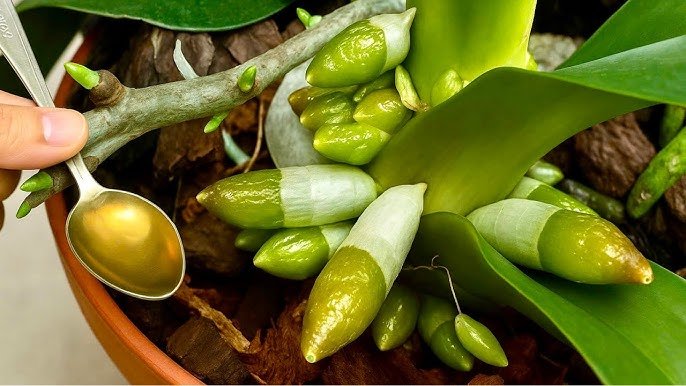
Step 1: Preparing the Rice Boost for Orchids
There are several ways to use rice for your orchid:
Method 1: Rice Water
- Take 1 tablespoon of rice and rinse it to remove dust.
- Soak it in half a cup of water for 4–6 hours.
- Strain the water; this nutrient-rich liquid is ready to use.
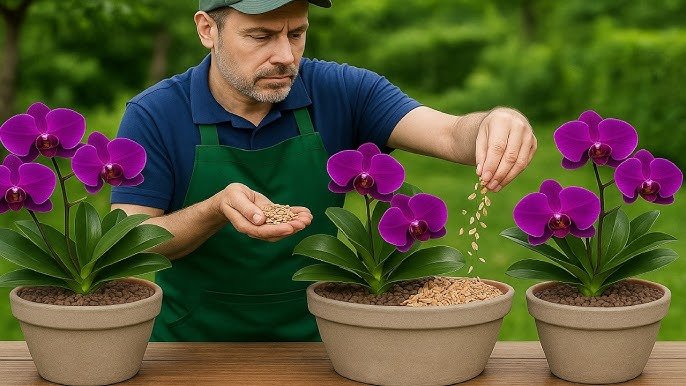
Method 2: Cooked Rice
- Cook 1 tablespoon of rice with minimal water until soft.
- Allow it to cool.
- Use it sparingly as a slow-release fertilizer by placing it on the growing medium.
💡 Tip: The weekly “1 spoon” guideline applies to either soaked rice water or cooked rice. Consistency is key for results.
Step 2: Applying the Rice Boost
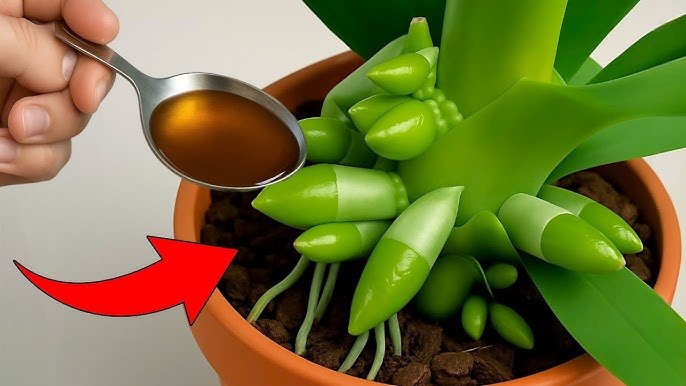
For Roots
- Pour the rice water directly onto the orchid roots.
- Ensure roots are lightly moistened but not waterlogged, as orchids are prone to rot.
For Leaves
- Spray a light mist of rice water on leaves to provide additional nutrients.
- Wipe off excess residue to prevent fungal growth.
Frequency
- Apply once a week, ideally on the same day, for optimal consistency.
- Overuse can lead to excessive residue; moderation is essential.
💡 Pro Tip: Use lukewarm rice water to avoid shocking the roots.
Step 3: Preparing Your Orchid for Maximum Growth
Rice works best when orchids are already in a healthy environment. Follow these steps:
1. Inspect Roots
- Remove your orchid from its pot and examine the roots.
- Trim away brown, mushy, or rotten roots with sterilized scissors.
2. Repot if Needed
- Use a well-draining orchid medium like bark, sphagnum moss, or coconut husk.
- Ensure roots are spread evenly and not compacted.
3. Provide Support
- Some orchids, like Phalaenopsis, benefit from support stakes to maintain upright growth.
💡 Tip: Healthy roots combined with weekly rice application accelerate new root emergence.
Step 4: Complementary Care Tips
Rice alone is powerful, but combining it with proper orchid care ensures the best results.
1. Light
- Orchids thrive in bright, indirect sunlight.
- Avoid direct sun, which can scorch leaves and roots.
2. Humidity
- Maintain 50–70% humidity using a pebble tray, humidifier, or misting.
- Rice application complements this by stimulating root growth in moist conditions.
3. Air Circulation
- Ensure good airflow around roots and leaves to prevent fungal infections.
4. Watering
- Water when the medium starts to dry, not on a fixed schedule.
- Rice water supplements regular watering but does not replace it.
5. Fertilization
- Use a balanced orchid fertilizer diluted to half strength every 2–3 weeks during the growing season.
- Rice acts as a natural booster, reducing dependence on chemical fertilizers.
Step 5: Monitoring Root and Flower Growth
After just a few weeks of weekly rice application, you may notice:
- New Roots Emerging: Small white or green root tips appearing around old roots.
- Stronger, Thicker Leaves: Leaves become darker green and more resilient.
- Early Flower Bud Formation: Even outside traditional bloom season, flower spikes may start forming.
💡 Tip: Patience is key. Visible results usually appear 3–6 weeks after starting the weekly rice regimen.
Step 6: Avoiding Common Mistakes
Even with a simple method like rice application, certain mistakes can hinder growth:
- Overwatering: Leads to root rot and fungal problems.
- Using Salted or Seasoned Rice: Can damage roots.
- Ignoring Dead Roots: Rotten roots can spread disease to healthy ones.
- Poor Lighting: Low light slows photosynthesis and reduces bloom potential.
- Inconsistent Application: Weekly consistency ensures gradual and sustained growth.
💡 Tip: Stick to 1 spoon a week, combined with proper care, for the most reliable results.
Step 7: Benefits of the Weekly Rice Method
- Rapid Root Development: Roots grow stronger and longer.
- Year-Round Flowering: Energy from rice helps orchids bloom continuously.
- Lush Leaves: Leaves become thick, vibrant, and healthy.
- Natural and Cost-Effective: Uses kitchen staples instead of chemical fertilizers.
- Safe for All Orchids: Works for Phalaenopsis, Dendrobium, Cattleya, and more.
Quick Summary: 1 Spoon a Week Method

| Step | Action |
|---|---|
| 1 | Use 1 tablespoon of plain rice weekly |
| 2 | Prepare rice water by soaking or boiling |
| 3 | Apply rice water to roots and lightly to leaves |
| 4 | Trim dead roots and repot in a healthy medium |
| 5 | Provide bright, indirect sunlight and moderate humidity |
| 6 | Fertilize with diluted orchid fertilizer every 2–3 weeks |
| 7 | Ensure good airflow and avoid overwatering |
| 8 | Monitor growth and enjoy new roots and flowers |
Final Thoughts
Orchids are delicate yet resilient plants, and their growth depends heavily on healthy roots. With just 1 spoon of rice a week, you can give your orchid a gentle, natural boost that encourages new root development, stronger leaves, and year-round flowering.
This method is not only effective but also safe, inexpensive, and easy to implement. Combine it with proper watering, lighting, humidity, and pruning, and your orchid will thrive like never before.
Start the weekly rice ritual today, and watch your orchid transform into a lush, flowering masterpiece, filling your home with elegance, fragrance, and vibrant beauty — all year round!