Ginger is one of the easiest—and most rewarding—plants you can grow right at home. Whether you live in a house with a garden or a small apartment with only a balcony, ginger grows beautifully in containers, requires very little maintenance, and rewards you with plump, aromatic roots. The best part? You don’t even need seeds. You can regrow ginger entirely from a fresh piece of store-bought ginger.
If you’ve been wondering how to transform a simple grocery-store rhizome into a thriving ginger plant, this guide will walk you through every step. In this 1200-word article, you’ll learn how to choose the right ginger pieces, prepare them for sprouting, plant them the correct way, and care for them until harvest. With a little patience and the right method, you can enjoy an endless supply of homegrown ginger for cooking, tea, and herbal remedies.
Why Growing Ginger at Home Is So Simple
Ginger (Zingiber officinale) isn’t a demanding plant. It thrives in warm, humid climates, enjoys partial shade, and prefers rich, moist soil. Unlike many other vegetables, you don’t need to worry about pollination, pests, or intensive maintenance. Ginger grows quietly underground, slowly expanding its rhizomes month by month.
With a single piece of ginger root from the supermarket, you can grow a whole container full of fresh rhizomes—often more flavorful than store-bought ones.
Step 1: Choosing the Right Store-Bought Ginger
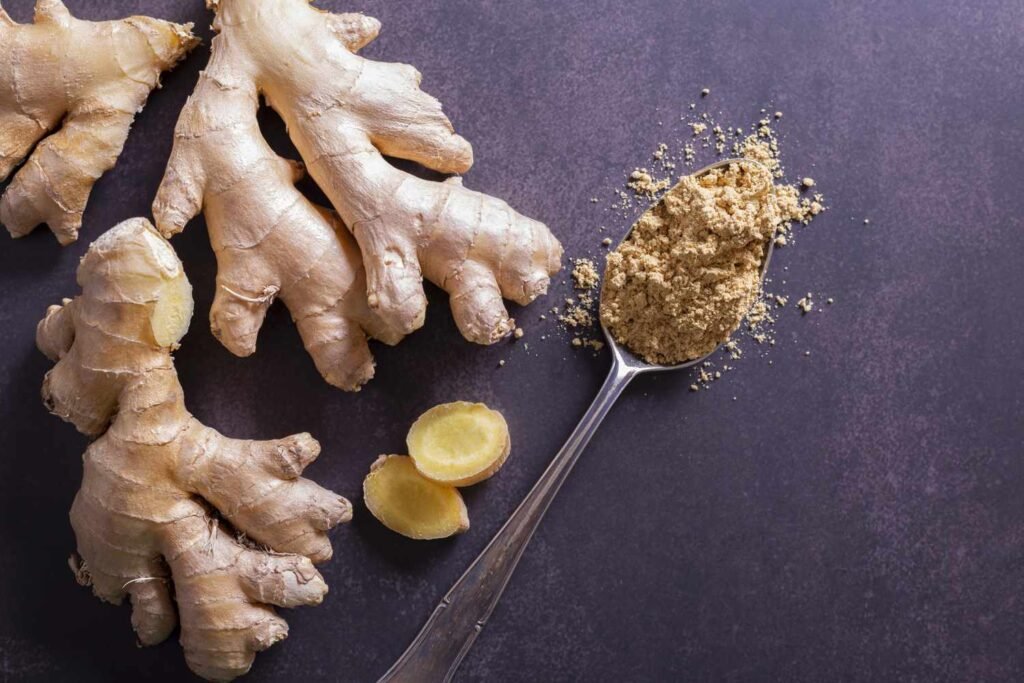
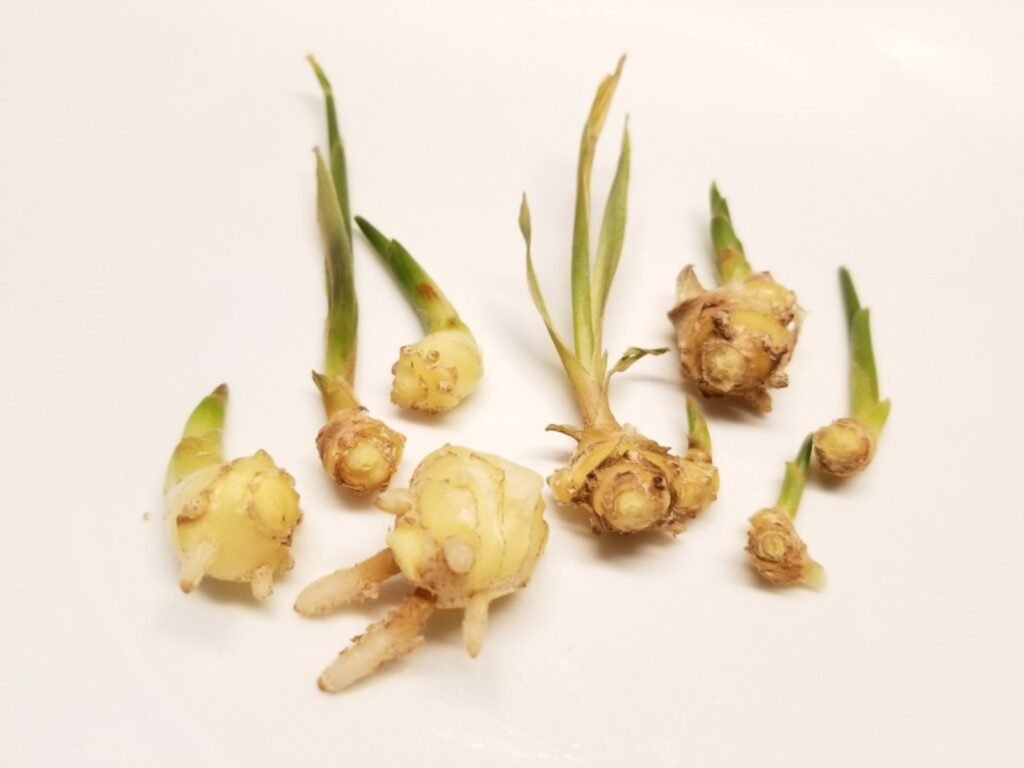
Not all ginger pieces will regrow well. To increase your success rate, choose ginger with:
- Firm texture (not shriveled or dry)
- Visible eyes or buds (small yellow or green tips)
- Organic, if possible (non-organic ginger may be treated with growth inhibitors)
Avoid pieces that:
- Have mold
- Are overly smooth with no bumps or buds
- Feel soft or watery
If your ginger has multiple knobs, that’s perfect—it means more sprouting points.
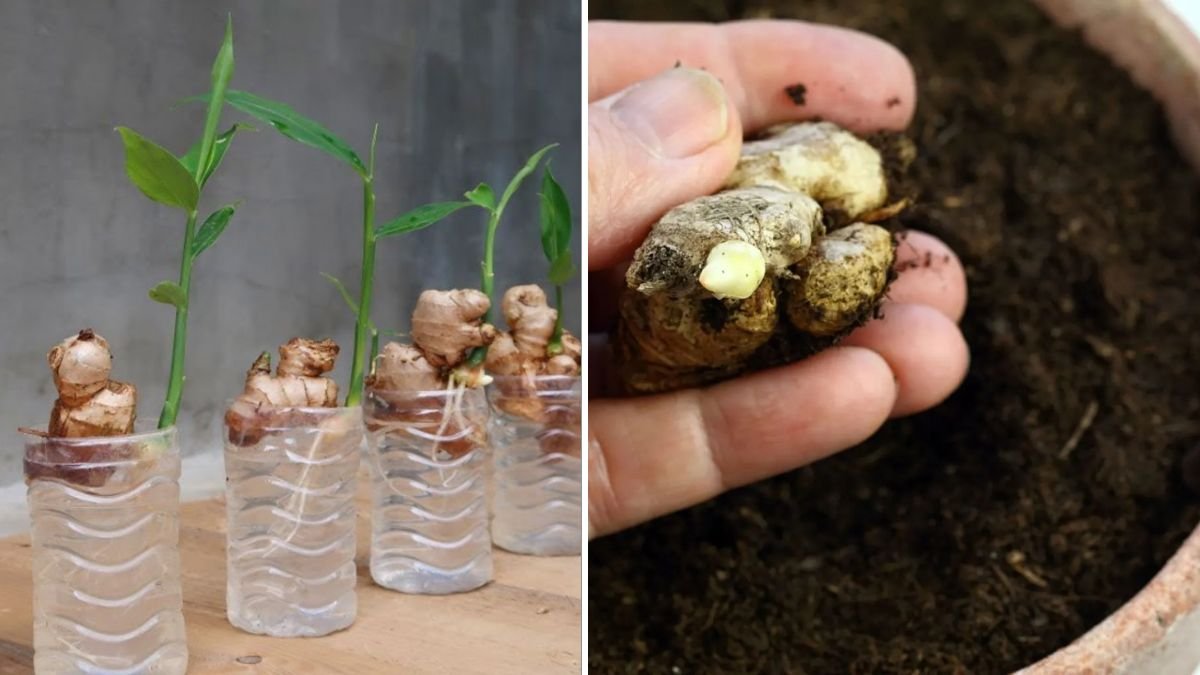
Step 2: Wake Up the Dormant Ginger
Store-bought ginger is often dormant, so activating it encourages quicker sprouting.
Method 1: Soak the Ginger
- Soak the ginger in warm water for 2–4 hours.
- This removes any growth inhibitors and hydrates the rhizome.
Method 2: Pre-Sprout in a Warm, Humid Spot
Place the ginger in:
- A paper bag
- A shallow tray with coconut coir
- A moist towel
Keep it in a warm place (around 25–30°C).
Within 1–3 weeks, tiny green “eyes” will emerge.
Pre-sprouting isn’t required—but it boosts success and growth speed.
Step 3: Cut and Cure for More Plants
If your ginger piece is large (over 8–10 cm), you can cut it into smaller sections.
Each section must have:
- 1–2 healthy buds
- At least 2–3 cm thickness
After cutting:
- Let the pieces dry for 12–24 hours.
- This forms a protective callus over the cut surface.
- Curing prevents rot after planting.
Step 4: Prepare the Perfect Soil for Ginger
Ginger loves loose, rich, well-draining soil.
Ideal soil mix:
- 40% garden soil
- 40% compost or worm castings
- 20% sand or coconut coir
This combination:
- Prevents waterlogging
- Provides nutrients for steady growth
- Allows rhizomes to expand freely
Container Requirements:
- Minimum depth: 25–30 cm
- Width: The wider, the better
- Drainage holes are essential
Ginger grows horizontally—so wider containers produce more rhizomes.
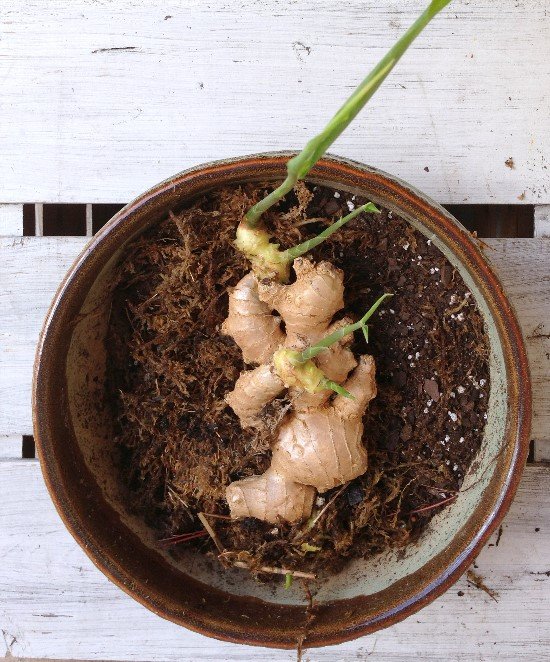
Step 5: Plant the Ginger the Right Way
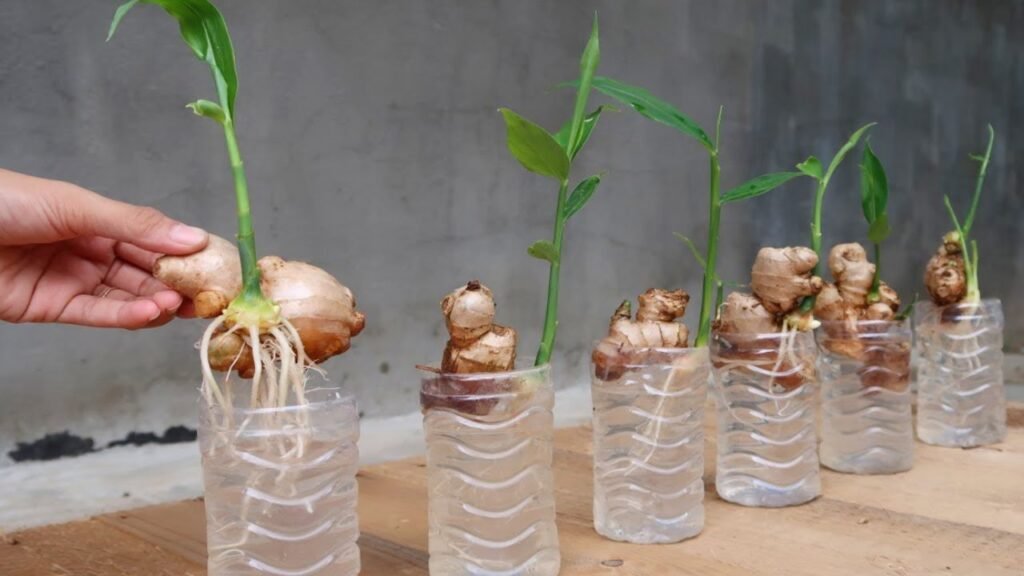
Planting ginger incorrectly is the most common reason for poor harvests. Here’s the right method:
➤ Planting Depth
- Place each ginger piece 2–3 cm below the surface.
- Buds should face upwards.
➤ Spacing
- Leave 15–20 cm between pieces.
- Ginger needs room to spread sideways.
➤ Moisture
After planting:
- Water lightly.
- Do NOT soak fully—ginger hates sitting in water.
Keep the soil moist but never soggy.
Step 6: Give Ginger Its Ideal Growing Environment
Ginger is a tropical plant, so it thrives in:
Temperature
- Best: 22–30°C
- Below 15°C, growth slows or stops.
Light
- Ginger prefers partial shade.
- Morning sun + afternoon shade is ideal.
This makes ginger perfect for:
- Balconies
- Shaded patios
- Indoor areas near windows
Humidity
- High humidity encourages lush leaves.
- Mist occasionally if air is very dry.
Step 7: Watering and Care Through the Growing Season
Ginger needs light but consistent moisture.
Watering Tips
- Keep soil evenly moist—not drenched.
- Reduce watering in cooler months.
- Mulch with dried leaves or straw to retain moisture.
Feeding
Ginger loves organic fertilizer. Apply:
- Vermicompost every 4 weeks
- Banana peel fertilizer for potassium
- Diluted seaweed extract monthly
This encourages bigger, juicier rhizomes.
Weeding
Remove weeds gently—they compete for nutrients.
Step 8: Watch for Healthy Growth Stages
After 3–5 weeks, new leafy shoots emerge.
After 2–3 months, leaves grow lush and tall.
Ginger grows slowly underground, so patience is key.
Step 9: Common Problems and Easy Solutions
1. Rotting Ginger
Cause: Overwatering
Fix: Improve drainage, reduce irrigation
2. No Sprouting
Cause: Old or chemically treated ginger
Fix: Use organic ginger or pre-sprout it
3. Thin, weak rhizomes
Cause: Poor soil or insufficient fertilizer
Fix: Add compost regularly
Step 10: Harvesting Ginger at the Right Time
Ginger offers two types of harvest:
Baby Ginger (Early Harvest)
- Ready in 4–5 months
- Mild, juicy, perfect for pickles and tea
To harvest:
- Gently dig around the plant and remove small sections.
- Leave the rest to keep growing.
Mature Ginger (Full Harvest)
- Ready in 8–10 months
- Stronger flavor and tougher skin
When leaves begin to yellow and dry, it’s harvest time.
To harvest:
- Uproot the entire plant
- Break off rhizomes
- Save healthy pieces for replanting
Step 11: Regrow Again for Endless Ginger
After harvesting, simply replant:
- The thickest, healthiest pieces
- With at least one visible bud
You can repeat this cycle every year for a lifelong supply.
Final Tips for Huge Ginger Yields
To maximize your harvest:
- Plant in wide containers
- Use rich organic compost
- Give partial shade
- Keep soil consistently moist
- Mulch heavily
- Feed regularly with mild organic fertilizer
Follow these steps and your ginger will thrive beautifully—even from a single grocery-store rhizome.
Final Thoughts
Regrowing ginger from store-bought ginger is one of the simplest and most satisfying gardening projects. With minimal tools, low maintenance, and almost no cost, you can enjoy fragrant, homegrown ginger anytime you want. Whether you’re making curries, teas, or natural remedies, nothing beats the freshness and flavor of ginger you’ve grown yourself.