
Lemon trees are among the most rewarding fruit trees you can grow at home. Their refreshing fragrance, evergreen foliage, and tangy fruits make them a gardener’s favorite across all climates—especially warm and tropical regions. But did you know you can grow your own lemon tree without buying a new plant?
Lemon tree propagation—whether through cuttings, seeds, air-layering, or grafting—allows you to create strong, healthy plants that produce fruits much sooner. With the correct techniques, even beginners can enjoy success.
In this comprehensive guide, you’ll learn the best methods to propagate lemon trees, the most effective hacks for faster rooting, and all the steps needed to grow a thriving lemon plant in your garden, balcony, or terrace.
Why Propagate Lemon Trees?
Before diving into the methods, here are the top reasons gardeners propagate lemon trees:
1. Faster Fruiting
A propagated cutting grows true to type, meaning it inherits all the characteristics of the mother plant—fruit size, taste, disease resistance, and production speed.
2. Cost-Effective
Instead of spending money on new plants, you can create many new trees for free.
3. Perfect for Small Spaces
Propagated lemon trees adapt well to containers and small gardens.
4. Healthier and More Reliable
You choose a healthy parent plant, ensuring the new tree will be equally strong.
Best Methods for Propagating Lemon Trees
There are four main methods, but two are the easiest and most effective:
✔️ Stem Cuttings
✔️ Air Layering (Marcotting)
Let’s explore each method step-by-step.
1. Propagating Lemon Trees from Stem Cuttings (Most Popular Method)
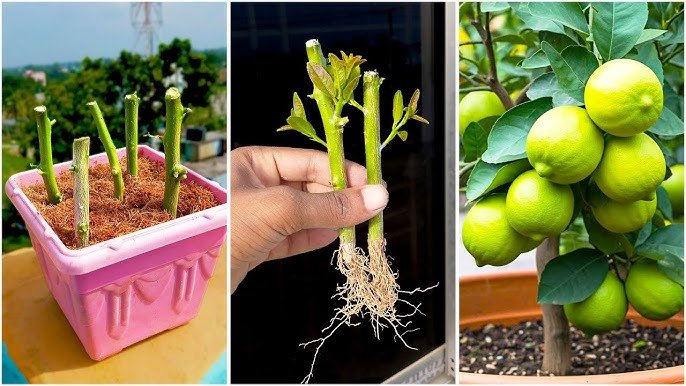
Stem cuttings are ideal for beginners and work exceptionally well during early monsoon, spring, or early summer.
Step 1: Choose the Perfect Branch
Select:
- A semi-hardwood branch (not too soft, not fully woody)
- 6–8 inches in length
- Disease-free and pest-free
- A branch with 3–4 nodes
- Preferably from a fruit-bearing mother plant
💡 Tip: Morning time is best for cutting branches because the plant is well-hydrated.
Step 2: Prepare the Cutting
- Remove all leaves from the lower part of the cutting.
- Keep only the top 2–3 leaves to reduce moisture loss.
- Make a clean 45° cut using sharp pruning shears.
Optional but powerful boost:
🟢 Dip the cut end in rooting hormone powder or honey to encourage faster root formation.
🪴 Step 3: Plant the Cutting
Prepare a loose, airy potting mix:
- 40% coco peat
- 30% river sand
- 20% garden soil
- 10% compost
Insert the cutting 2–3 inches deep into the pot.
Firm the soil around the base so the cutting stands upright.
Step 4: Perfect Watering Technique
Water lightly—do NOT drench the soil.
Excess water = rotting.
Slight moisture = rooting success.
Place the pot in bright, indirect sunlight.
Step 5: Create a Humidity Dome
Cover the pot with:
- A transparent plastic bottle
- A polythene bag
- A mini greenhouse cover
This traps moisture and speeds up root growth.
Leaves should NOT touch the plastic.
Step 6: Root Development Timeline
You’ll see results in:
- 2–3 weeks – new leaf growth
- 4–6 weeks – strong root development
- 8–10 weeks – ready for transplanting
Once roots are strong, shift the plant to a bigger pot (12–15 inches) or garden soil.
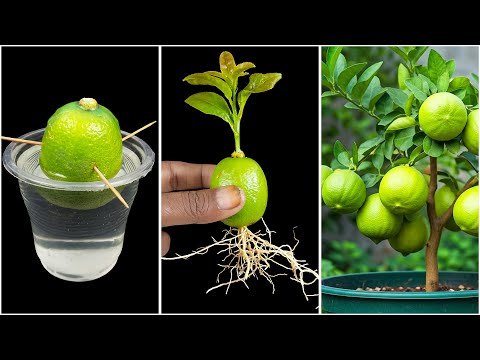
2. Air Layering: A Guaranteed Method with Fast Results
For gardeners who want 100% success, air layering is the best technique. It creates a rooted branch while still attached to the mother plant.
Step 1: Select a Healthy Branch
Choose:
- 1-year-old branch
- Pencil-thick or slightly thicker
- No pest or disease damage
Step 2: Remove the Bark
Cut a 1-inch ring around the branch and scrape off the green cambium layer.
This stops food flow, forcing the plant to create roots at that point.
Step 3: Apply Rooting Hormone (Optional)
Apply rooting gel or powder on the cut area for faster root formation.
Step 4: Wrap with Moist Medium
Use:
- Coco peat
- Sphagnum moss
- Garden soil + compost mix
Wrap the medium around the cut area and secure with plastic wrap.
Tie both ends with thread or gardening tape.
Step 5: Let the Roots Grow
Place the plant in a shaded area and keep the moss moist every 10–15 days.
Roots will appear in:
- 4–6 weeks during summer
- 8–12 weeks during winter
Once roots fill the moss ball, cut below the rooted section and plant it in a pot.
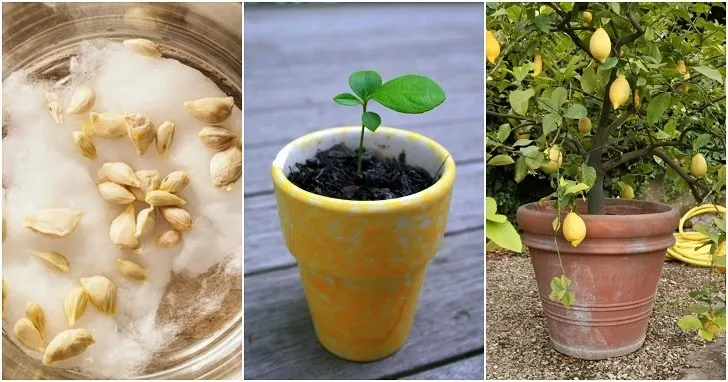
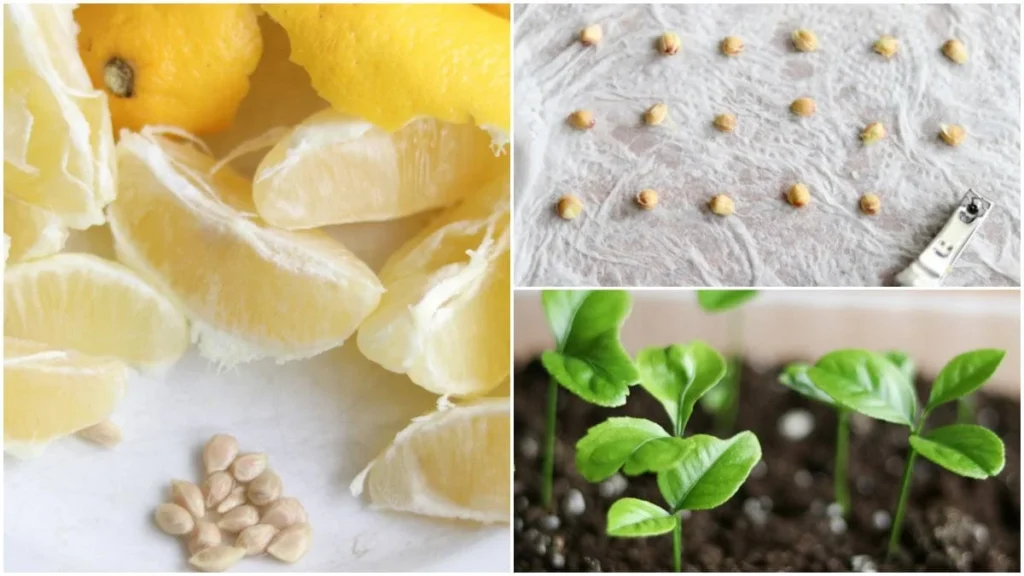
3. Propagation from Seeds (Slower but Fun)
Growing from seeds is easy but takes 3–5 years to fruit.
Use organic lemons because market lemons may be sprayed with growth inhibitors.
4. Grafting Lemon Trees (For Experts)
Grafting allows you to combine:
- A strong rootstock
- A productive scion
- Disease resistance
This method yields large harvests and is ideal for commercial growers.
Caring for Your Newly Propagated Lemon Tree
Once your plant is established, follow these steps:
Sunlight Requirements
Lemons need at least:
- 6–8 hours of full sunlight daily
- Morning sun is best
🪴 Soil Mix for Fast Growth
Use:
- 40% garden soil
- 30% compost
- 20% coco peat
- 10% sand
Watering Schedule
- Keep soil moist but never waterlogged.
- Water only when the top layer feels dry.
Fertilizing Routine
Apply fertilizers:
- Every 30 days
- Vermicompost, cow dung, or homemade compost
- Apply potash-rich fertilizer during blooming
Encourage More Fruits
- Prune weak branches
- Remove suckers from the base
- Keep plant in full sun
- Add bone meal or banana peel fertilizer before flowering season
Common Problems & Solutions
Yellow Leaves
➡️ Overwatering or nutrient deficiency
✔️ Fix: Add compost + reduce watering
Leaves curling
➡️ Pest attack
✔️ Fix: Neem oil spray weekly
No fruits
➡️ Lack of sunlight
✔️ Fix: Shift plant to sunny location
Final Thoughts
Propagating lemon trees is enjoyable, rewarding, and surprisingly easy when done correctly. Whether you choose cuttings or air layering, both methods ensure fast growth, healthy plants, and a future full of juicy lemons. With proper care, your propagated lemon tree will give you fruits year after year—turning your garden or balcony into a mini citrus paradise.