
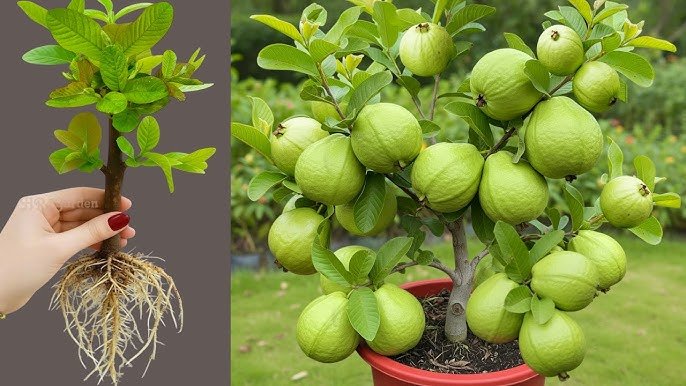
Guava trees are among the most productive, flavorful, and easy-to-grow fruit trees for tropical and subtropical climates. But did you know you can dramatically improve fruit quality, increase yield, and grow faster-bearing guava trees simply through grafting? Grafting is an ancient horticultural technique that allows you to join two different guava plants into one, combining the strengths of both. The result? A powerful, vigorous tree that fruits earlier, grows stronger, and gives consistent, high-quality harvests.
In this comprehensive 1200-word guide, you will learn everything about guava tree grafting—why it’s used, the best techniques, step-by-step instructions, tools needed, aftercare, common mistakes, and expert tips to ensure a high success rate.
What Is Grafting and Why Use It for Guava Trees?
Grafting is the method of joining two plant parts:
- Rootstock: The lower part, with strong roots
- Scion: The upper part, taken from a high-quality mature tree
When these two parts are joined properly, they grow together and form a single, improved plant.
Why graft guava trees?
1. Faster Fruit Production
Seed-grown guava trees take 4–6 years to fruit.
But grafted guava trees fruit in just 2–3 years.
2. Superior Fruit Quality
Grafting allows you to grow the exact fruit variety you prefer:
- Sweeter
- Bigger
- Juicier
- More fragrant
3. Disease Resistance
Rootstock provides strong immunity against soil-based diseases.
4. More Trees in Less Space
You can even graft multiple varieties on one tree—“multi-flavor guava tree.”
5. Consistent Growth
Grafted trees remain compact, easy to maintain, and highly productive.
Best Time for Grafting Guava Trees
Guava grafting works best during the plant’s active growth stage. Ideal seasons:
- Early Spring (February–April)
- Early Monsoon (June–July)
- Late Monsoon (August–September)
Avoid winter and extremely hot summer months, as growth slows down.
Tools and Materials You Need
To graft guava trees like a professional, gather:
- Sharp pruning shears
- Grafting knife
- Grafting tape or polythene strip
- Rootstock guava plant (1–2 years old)
- Healthy scion from a mature fruiting guava tree
- Sanitizer or rubbing alcohol
- Garden gloves
- Fungicide paste or melted wax
Clean tools are essential. Always disinfect knives to avoid infections.
Choosing the Right Rootstock and Scion
Rootstock Selection
Choose a rootstock that is:
- 1–2 years old
- 2–3 feet tall
- Disease-free
- With strong, straight growth
Local or wild guava varieties make excellent rootstocks because they have:
- Strong root systems
- High disease resistance
- Better adaptability
Scion Selection
Choose a scion (branch piece) that is:
- Taken from a healthy mature tree
- 4–6 inches long
- Pencil-thick
- Contains 3–4 buds
- Free from pests
Scion wood from branches that recently fruited works exceptionally well.
Top 3 Grafting Methods for Guava Trees
The most effective and widely used grafting techniques for guava are:
1. Cleft Grafting
2. V-Grafting (Wedge Grafting)
3. T-Budding (Shield Budding)
Let’s explore each in detail.
Method 1: Cleft Grafting (Best for Beginners)
Cleft grafting is simple, highly successful, and perfect when the rootstock is thicker than the scion.
Step-by-Step Instructions
Step 1: Prepare the Rootstock
Cut the rootstock horizontally at the top.
Make a 1–2 inch vertical slit (cleft) in the middle.
Step 2: Prepare the Scion
Trim the bottom end into a wedge shape—two slanted cuts forming a sharp point.
Step 3: Insert the Scion
Slide the scion wedge into the cleft.
Ensure cambium layers (green inner tissue) of both parts touch.
This is crucial for successful union.
Step 4: Wrap Tightly
Use grafting tape, plastic strip, or polythene to wrap the joint securely.
Step 5: Seal the Graft
Apply grafting wax or fungicide paste to prevent infection.
Method 2: V-Grafting (Wedge Grafting)
This method is excellent when both scion and rootstock are the same thickness.
Steps:
- Cut the rootstock top into a V-shape.
- Shape the scion bottom into an inverted wedge.
- Fit them together like puzzle pieces.
- Wrap with grafting tape.
- Seal the area.
This method ensures a firm, stable joint and high success rate.
Method 3: T-Budding (Shield Budding)
T-budding is used when scion wood is limited or when grafting multiple plants quickly.
Steps:
- Make a “T-shaped” cut on the rootstock.
- Peel the bark slightly open.
- Cut a healthy bud from the scion along with a small bark shield.
- Insert the bud under the “T” flap.
- Wrap tightly, leaving the bud exposed.
Budding is fast, easy, and very effective in warm, humid weather.
Aftercare of Grafted Guava Plants
Care after grafting is as important as the grafting itself.
1. Keep the Graft Area Clean
Avoid touching or bending the graft joint.
2. Provide Shade
Newly grafted plants need shaded or filtered sunlight for 2–3 weeks.
Too much sunlight dries the scion.
3. Water Carefully
Keep soil slightly moist, not waterlogged.
Overwatering may cause root rot.
4. Remove Rootstock Shoots
Any shoots growing below the graft union should be removed.
Otherwise, they steal nutrients from the scion.
5. Remove the Wrap
After 25–30 days, gently loosen the grafting tape.
If the joint has united, remove the wrap completely after 45 days.
How to Know Your Graft Is Successful
Your graft has taken successfully if:
- The scion remains green
- New leaves sprout within 3–6 weeks
- The graft union looks tight and healed
- The plant shows fresh growth
If the scion turns brown or shrivels, the graft has failed.
Common Mistakes to Avoid
Avoid these mistakes to increase your success rate:
❌ Using dull or dirty knives
❌ Not aligning cambium layers properly
❌ Grafting during extreme heat or winter
❌ Using diseased or weak scion wood
❌ Not sealing the graft
❌ Overwatering after grafting
Fertilizing Grafted Guava Trees
Once the graft starts growing:
Feed every 20–30 days with:
- Vermicompost
- Cow dung manure
- Seaweed extract
- NPK 19-19-19 (optional)
For fruiting:
- Apply high potassium fertilizers
- Banana peel water
- Wood ash
When Will Grafted Guava Trees Fruit?
One of the biggest advantages of grafting:
Grafted guava trees fruit within 1.5–3 years
Seedlings can take 5–6 years or more.
Some high-yield varieties grafted on good rootstock may fruit even earlier.
Benefits of Grafted Guava Trees
- Stronger root system
- Resistant to drought and diseases
- Faster fruiting
- Better fruit quality
- Consistent yield
- Can graft multiple varieties on one tree
Grafting is a game-changer for guava growers.
Final Thoughts
Grafting guava trees is one of the most effective ways to grow stronger, healthier, and highly productive guava plants. Whether you’re a home gardener or a serious grower, mastering grafting gives you complete control over fruit quality, growth speed, and tree performance.
With the right technique—cleft grafting, V-grafting, or T-budding—you can create guava trees that are stronger, more adaptable, and quicker to fruit. With patience, proper care, and the techniques shared in this guide, you can enjoy years of abundant, delicious guava harvests from trees you grafted with your own hands.