Guava is one of the easiest and most rewarding fruit trees you can grow at home. With its delicious aroma, soft flesh, and high vitamin C content, guava is a favorite in tropical and subtropical gardens. But did you know that you can grow a new guava tree without seeds, without waiting years, and without complicated tools?
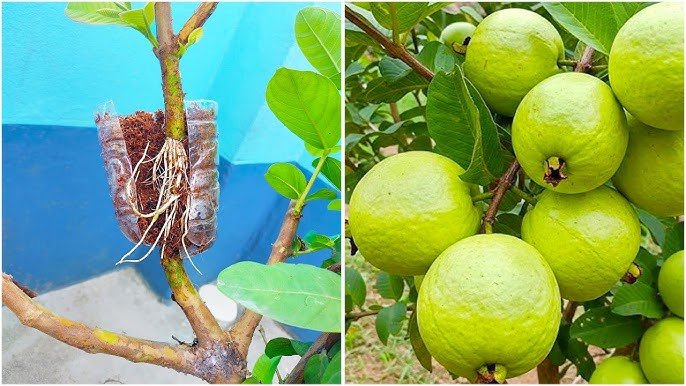
The secret? Air layering—a simple, reliable, and highly successful method of propagation that allows you to clone a mature guava tree and enjoy faster fruiting. If you’re a home gardener dreaming of producing your own guavas quickly, this step-by-step guide will show you exactly how to do it.
Let’s begin your guava-growing journey!
Why Choose Air Layering for Guava?
Guava trees grown from seeds often take 3–5 years to produce fruit and may not resemble the parent plant. But air layering offers huge advantages:
Faster fruiting
Air-layered guava trees can bear fruit in 1–2 years, since they come from mature wood.
Guaranteed variety
The new tree is genetically identical to the mother plant—same fruit quality, taste, color, and size.
Higher success rate
Compared to cuttings, guava air layering has an excellent rooting success rate when done correctly.
Can be done anytime
Although best in spring and monsoon, air layering is possible nearly year-round in warm climates.
Materials You Need
Before you begin, prepare the following:
- A healthy branch of your guava tree
- Sharp knife or blade
- Rooting hormone (optional but very helpful)
- Moist coco peat or sphagnum moss
- Plastic wrap or poly sheet
- Jute rope, twine, or zip ties
- Aluminum foil (optional for sunlight protection)
- Gloves and disinfectant for tools
With these items ready, you can start the air-layering process with confidence.
Step-by-Step Guide: How to Air Layer a Guava Tree
Step 1: Choose the Perfect Branch
Select a branch that is:
- Healthy and disease-free
- Pencil-thick to thumb-thick (1–2 cm diameter)
- Semi-hardwood (neither too young nor too old)
- Exposed to sunlight
- Around 1–1.5 feet long
Avoid soft green stems—they rot easily. Older branches develop roots much faster.
Step 2: Make the Cut (Girdling Method)
This is the most important step.
- Measure 1 inch (2–3 cm) of space on the branch.
- Make a circular cut around the branch using a blade.
- Make another cut 1 inch below the first cut.
- Connect both cuts and remove the entire ring of bark.
- Scrape the exposed wood lightly to remove the green cambium layer.
This prevents the flow of nutrients downward, forcing the branch to send energy to root development.
Pro Tip:
If the cambium layer is not completely removed, the branch may heal instead of rooting.
Step 3: Apply Rooting Hormone (Optional but Powerful)
Dust the exposed area with:
- Powdered rooting hormone
- Or dip in gel rooting hormone
This step increases success rate by up to 40–50% and speeds up root formation.
Step 4: Prepare the Rooting Medium
Soak coco peat or sphagnum moss in clean water for 20 minutes. Then squeeze gently to remove excess water.
It should be moist, not dripping.
Coco peat is excellent because:
- It retains moisture
- It prevents fungal growth
- It provides air pockets for rooting
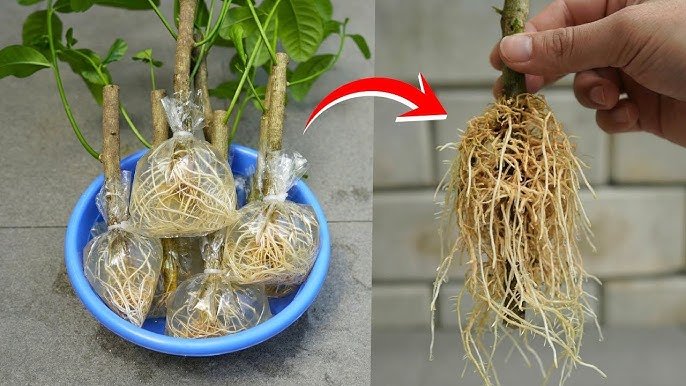
Step 5: Wrap the Branch Properly
- Take a handful of moist coco peat or moss.
- Pack it tightly around the exposed cut.
- Wrap the moss with polythene sheet securely.
- Seal both ends with rope, tape, or zip ties.
Ensure no water can enter or escape—constant moisture is crucial.
Optional Step: Wrap with Aluminum Foil
Foil prevents:
- Excess heat
- Sunlight exposure
- Moisture loss
This helps roots develop faster.
Step 6: Wait and Monitor
Root formation usually takes:
- 4–6 weeks in summer
- 6–10 weeks in winter
Check for these signs:
Signs that the Air Layer is Successful:
- Roots visible through the plastic
- The moss becomes dense and firm
- Branch remains green and healthy
If roots have not formed after 10 weeks, leave it for another month.
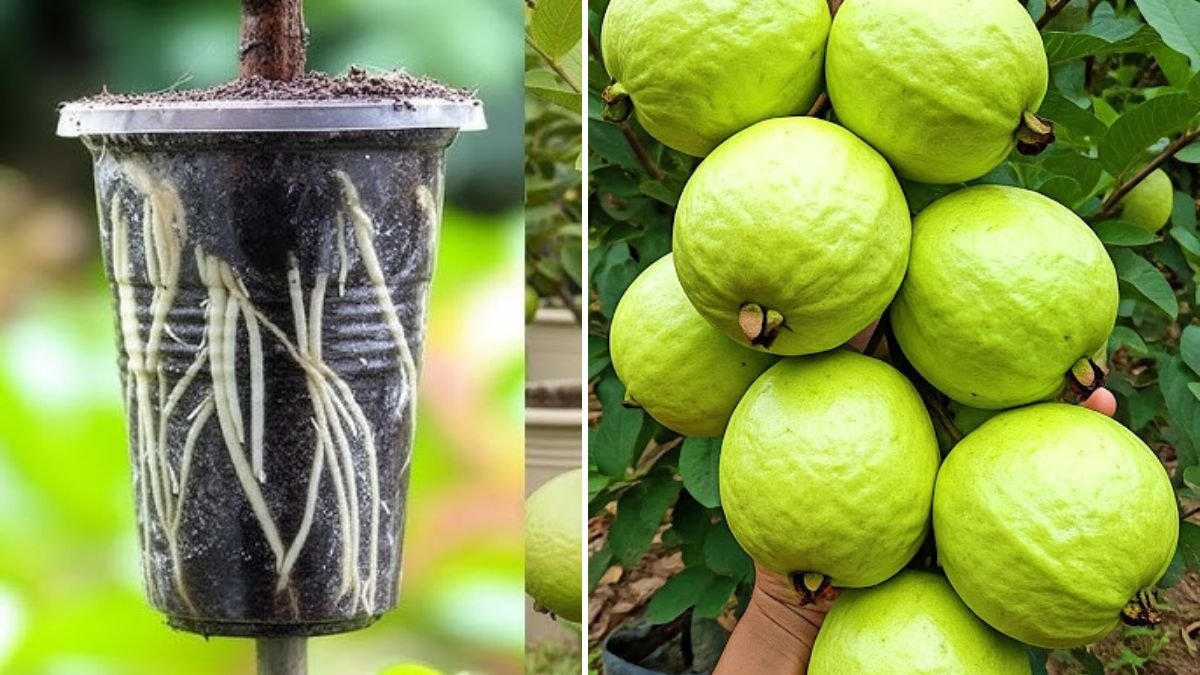
Step 7: Cut and Plant Your New Guava Tree
Once you see a thick cluster of white or cream-colored roots, it’s time to plant.
How to separate the layered branch:
- Cut 1–2 inches below the root ball using sharp pruning shears.
- Remove the plastic wrap gently.
- Do NOT remove the coco peat—keep it intact around the roots.
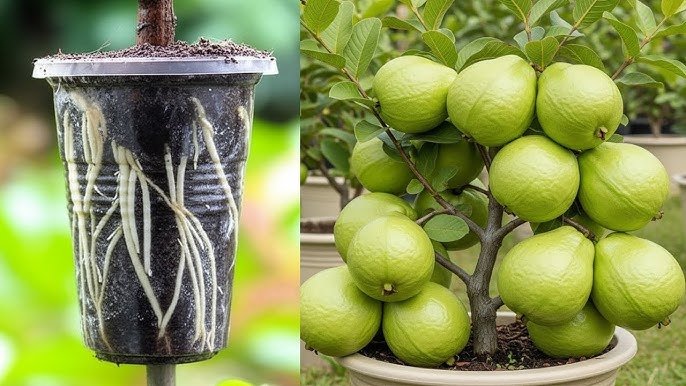
Planting Instructions:
- Use a large container or plant directly in soil.
- Prepare a rich potting mix:
- 40% garden soil
- 30% compost (cow dung or vermicompost)
- 20% coco peat
- 10% sand
- Plant the rooted branch carefully and water lightly.
- Keep it in partial shade for 7–10 days.
Aftercare for Your Young Guava Plant
Your new guava tree needs gentle care in the first few weeks.
Watering
Keep the soil moist but never waterlogged. Overwatering can cause root rot.
Sunlight
After one week in shade, gradually move it to full sunlight.
Fertilization
Feed your guava plant:
- Vermicompost every 30–40 days
- Banana peel fertilizer every 15 days
- Seaweed extract monthly for strong root growth
Pruning
Pinch the tips to encourage:
- Bushier growth
- More branches
- Higher fruit yield
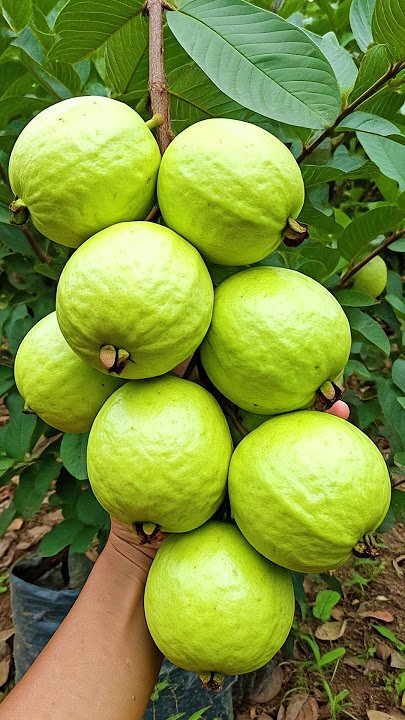
When Will Your Air-Layered Guava Tree Bear Fruit?
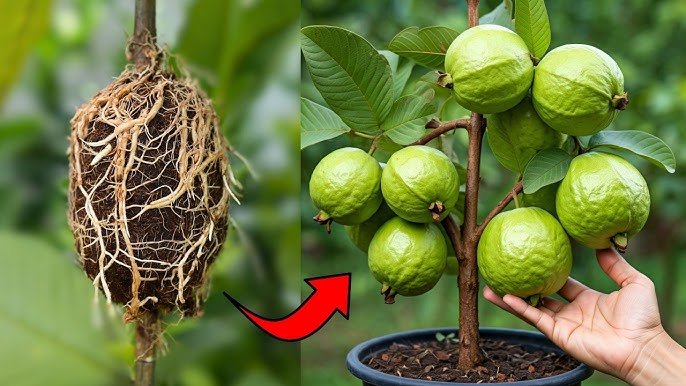
With proper care, your new guava plant will start producing fruits in:
1–2 years only!
This is much faster compared to seed-grown plants.
Some varieties even fruit within 10–12 months after being layered.
Common Problems and Troubleshooting
Moss dries out
- Solution: Rewrap and add water using a syringe.
Branch turns black
- Cause: Fungus due to excess moisture.
- Solution: Remove old moss, recut, and start again.
No roots after 10 weeks
- Possible reasons:
- Wrong season
- Very old branch
- Moss too tight
- Branch healed itself
Try another branch in a sunnier location.
Best Time for Air Layering Guava
For maximum success, perform air layering during:
Early monsoon (best)
Spring season
Late summer
Avoid extremely cold months as root formation slows down.
Final Thoughts: Growing Guava with Air Layering is Easy and Rewarding
Air layering is one of the most reliable ways to propagate guava trees—especially if you want faster fruiting and guaranteed results. With just a knife, some coco peat, and patience, you can turn a single branch into a whole new tree.
Whether you’re a beginner or an experienced gardener, this method is a game-changer that gives you strong, healthy guava plants that bear fruits quickly.
If you follow the steps in this guide carefully, your air-layered guava tree will thrive, grow vigorously, and reward you with sweet, juicy fruits in no time.