Growing your own melons might sound like a luxury reserved for farmers with wide open fields—but what if you could grow delicious, sweet, home-grown melons right on your balcony or in your small backyard? Even better, what if you could do it using kitchen waste instead of expensive fertilizers?
Yes, it’s completely possible!
In this 1200-word guide, you’ll learn a simple, sustainable, and highly effective method for growing melons in containers using everyday kitchen scraps. Not only does this method reduce waste, but it also produces nutrient-rich soil that boosts plant growth, improves fruit sweetness, and keeps your gardening nearly cost-free.
Let’s dive in and turn your kitchen waste into golden melons!
🌟 Why Grow Melons in Containers Using Kitchen Waste?
Melon plants are known for producing large, flavorful fruits, and many gardeners believe they need sprawling land to grow. But modern urban gardening techniques prove the opposite—melons actually love deep containers, and when paired with nutrient-rich compost made from kitchen scraps, they grow even faster and sweeter.
Here’s why this method works so well:
✔ Compost from kitchen waste is full of micronutrients
Fruit peels, vegetable scraps, eggshells, and coffee grounds break down into a powerful natural fertilizer.
✔ Container gardening gives you full control
You control the soil, moisture, drainage, sunlight, and spacing—no weeds, no overcrowding.
✔ Saves money
You reduce fertilizer costs while recycling waste sustainably.
✔ Perfect for small spaces
A balcony, patio, rooftop, or even a sunny doorstep is enough to grow 1–2 healthy melon vines.
🌱 Step-by-Step Guide: How to Grow Melons in Containers Using Kitchen Waste
1. Choose the Right Container
Melons need space for root growth.
Recommended size:
- Minimum: 40–50 liters
- Depth: At least 16–18 inches
- Width: 18 inches or more
Use:
- grow bags
- plastic buckets
- clay pots
- recycled tubs
Be sure the container has good drainage holes, because waterlogging can kill young melon roots.
2. Prepare the Kitchen Waste Compost Base
This is the secret to your melon’s fast growth.
Kitchen scraps you can use:
- fruit peels (banana, mango, melon, papaya)
- vegetable scraps
- eggshells (crushed for calcium)
- coffee grounds
- tea leaves
- leftover rice or bread (small amounts)
- spoiled fruits
Avoid:
- meat
- oil
- dairy
- salty foods
How to prepare it:
Option A: Direct Burial Method (Fast & Easy)
- Add 3–4 inches of soil into the bottom of the container.
- Add a layer of mixed kitchen waste (about 2 inches).
- Cover the waste with 4–6 inches of soil, compost, or cocopeat.
- Press lightly and water.
The buried waste decomposes naturally and becomes a slow-release fertilizer.
Option B: Pre-Compost Method (If You Want It Cleaner)
If you prefer not to bury fresh scraps:
- Place kitchen waste in a compost bin for 2–3 weeks.
- Add this partially decomposed compost as the bottom and center layer of your container.
Either option works beautifully for melons.
3. Prepare the Soil Mix
Melons grow best in light, well-draining, nutrient-rich soil.
Best soil mix ratio:
- 40% garden soil
- 30% compost (or decomposed kitchen waste)
- 20% cocopeat
- 10% sand or perlite
This mix ensures:
- good aeration
- fast root development
- moisture balance
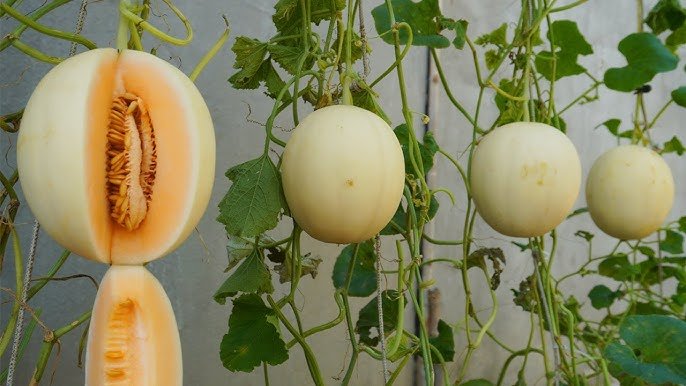
4. Choose the Right Melon Variety
Not all melons grow equally well in containers, but many compact or climbing types thrive beautifully.
Recommended varieties:
- Honeydew
- Cantaloupe
- Musk melon
- Sugar baby melon
- Thai Golden melon
- Korean small melons (Chamoe)
Vines of these varieties adapt well to container spaces when supported properly.
5. Planting Melon Seeds
Melon seeds germinate quickly in warm conditions.
How to plant:
- Make a 1-inch hole in the soil.
- Drop 2–3 seeds in each hole.
- Cover lightly and water.
- After germination (5–7 days), keep the strongest seedling and remove the others.
Tip:
Soak seeds in warm water for 6–8 hours before planting to improve germination speed.
6. Provide Strong Sunlight
Melons love heat.
Sun requirement:
6–8 hours of direct sunlight every day.
If you live in a cooler region, place your container:
- near walls (they reflect heat)
- on terraces/rooftops
- in sunniest spots
Warmth is key for sweet melons.
7. Watering the Right Way
Melons need consistent moisture during early growth, but too much water later can reduce sweetness.
Watering rule:
- Keep soil moist during germination and vining.
- Reduce watering once fruits begin to mature.
- Water deeply but less frequently.
Avoid wetting the leaves
Wet foliage encourages fungal problems.
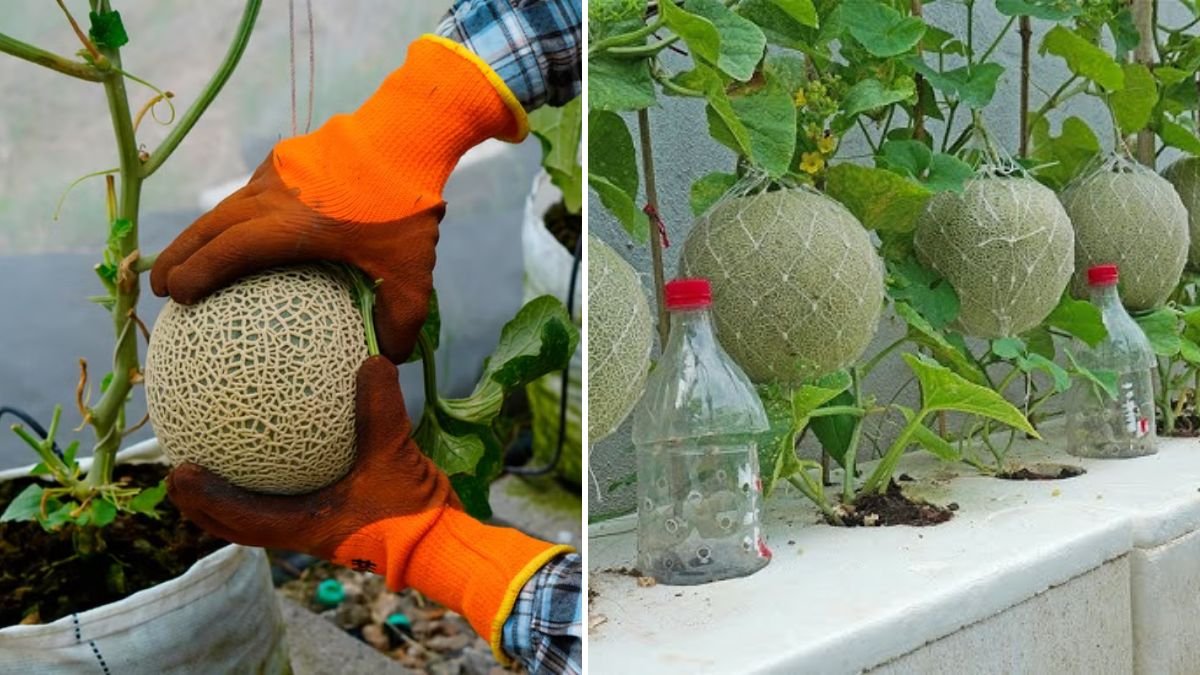
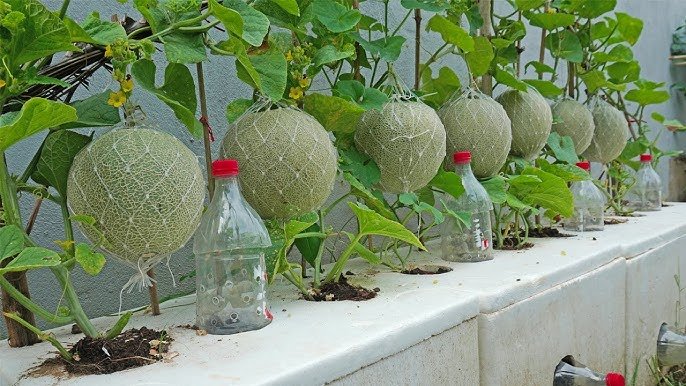
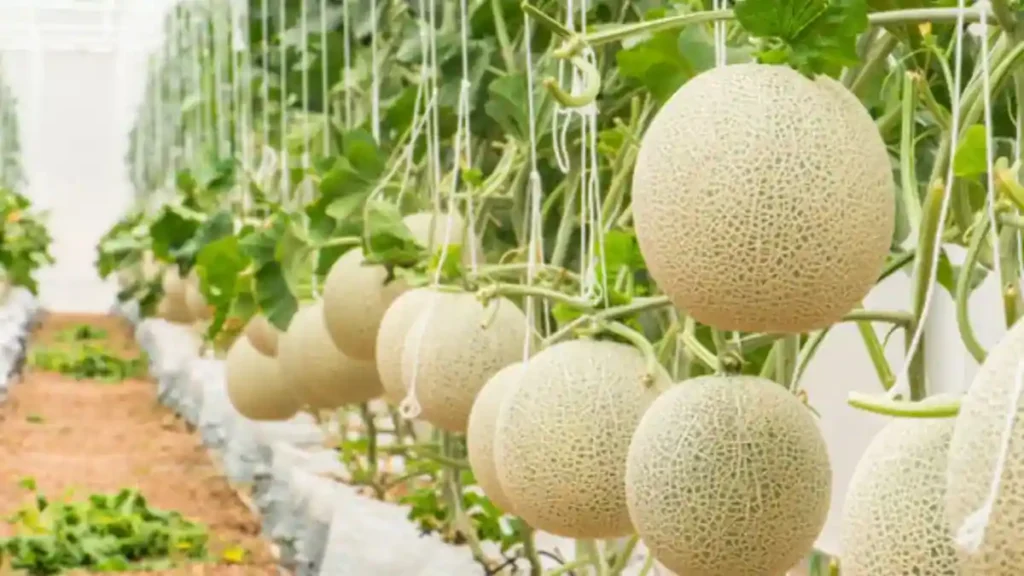
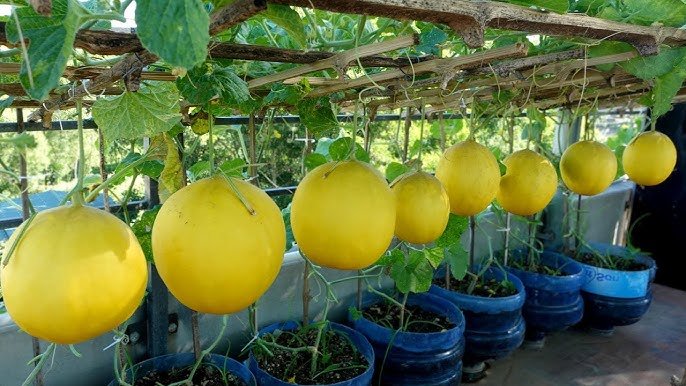
8. Training the Melon Vines
Container melons perform best with support.
Use:
- bamboo sticks
- trellis
- nylon net
- wooden frames
Why support is important:
- prevents fruit rot
- increases airflow
- saves space
- allows more fruits to form
When melons hang, they grow better and receive more sunlight.
9. Feeding the Plants Naturally
The kitchen waste layer will slowly release nutrients, but melons are heavy feeders. Boost them once every 2–3 weeks using:
Organic fertilizers:
- banana peel fertilizer (potassium)
- eggshell tea (calcium)
- compost tea
- onion peel fertilizer
- fish amino acid (if available)
- Epsom salt (once a month for magnesium)
These natural boosters improve:
- fruit size
- sweetness
- vine health
10. Pollination Tips
Melons produce male and female flowers.
How to identify female flowers:
They have a tiny baby melon at the base.
If bees are limited, hand-pollinate:
- Pick a male flower.
- Gently touch its pollen to the center of the female flower.
This ensures fruit formation.
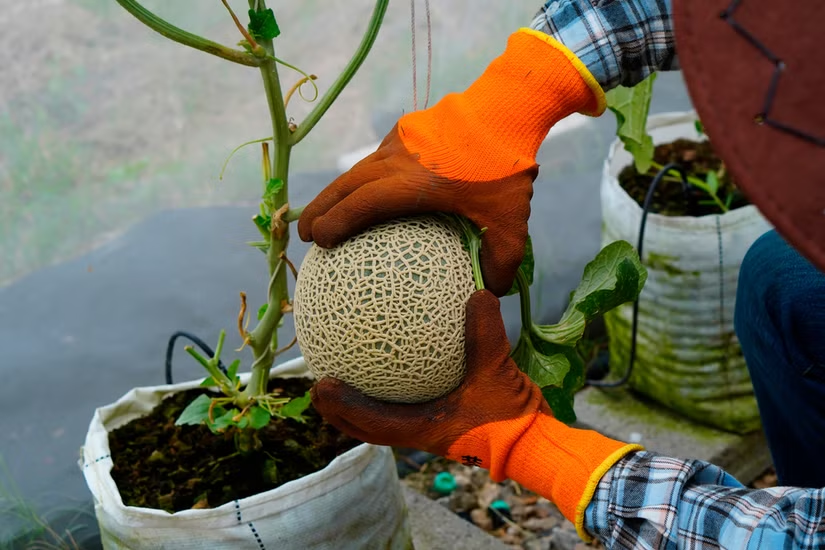
11. Supporting Growing Fruits
Once fruits become heavy:
- use a soft cloth sling
- net bag
- old T-shirt pieces
Tie the sling to the trellis to support the weight of the melon.
This prevents the fruit from snapping off the vine early.
12. When to Harvest Your Melons
Melons give clear signs when ripe:
Look for:
- sweet aroma
- a yellowish base color
- netting pattern forming (on cantaloupes)
- vine near fruit starting to dry
- fruit easily detaching from stem
Never pick melons too early—they sweeten most in the final week.
🌟 Why Kitchen-Waste Melons Taste Better
Here’s the magic:
Kitchen waste creates soil rich in:
- potassium (sweetness booster)
- phosphorus (flowering & fruiting)
- calcium (strong vines)
- nitrogen (leaf growth)
This natural nutrition leads to:
- sweeter fruits
- better aroma
- larger size
- healthier vines
Gardeners consistently report 20–30% sweeter melons when using composted kitchen waste.
🌍 Final Thoughts
Growing melons in containers may sound challenging, but with kitchen waste as your natural fertilizer, the process becomes simple, economical, and incredibly rewarding.
Imagine slicing into a juicy, fragrant melon that you grew with your own hands—right from recycled kitchen scraps!
This method is:
- beginner-friendly
- eco-friendly
- budget-friendly
- space-efficient
If you want to grow delicious melons without spending much, this is the perfect place to start.