
Imagine growing fresh vegetables, herbs, and leafy greens without soil, without pots, and without a large garden—just clean, nutrient-rich water flowing through a vertical system that uses the smallest space possible. Sounds futuristic? It’s actually simple, affordable, and easy enough for beginners!
Vertical hydroponics is one of the most efficient ways to grow food at home. When you build a system without pots, using just pipes or recycled containers, you save money, reduce waste, and grow more plants in less space than traditional gardening.
This guide will walk you through how to build an easy, low-cost vertical hydroponic system without pots, the best plants to grow, the nutrient needs, and how to maintain a high-yield setup.
Let’s dive in!
What Is Vertical Hydroponics?
Hydroponics is the method of growing plants using water and nutrients instead of soil. When you grow vertically, the plants are arranged in columns or towers, allowing you to maximize production even in very small spaces like:
- Balconies
- Terraces
- Rooftops
- Kitchens
- Small backyards
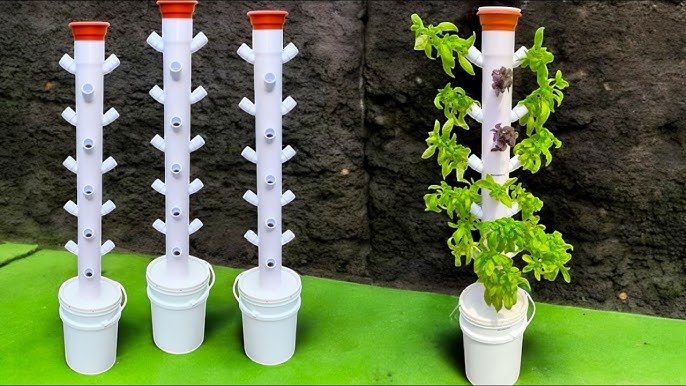
A no-pot vertical hydroponics system uses:
- PVC pipes
- Plastic bottles
- Tower tubes
- Net cups or holes directly in the pipe
Plants grow in water-filled channels, absorbing nutrients through the roots.
Why Build a No-Pot Vertical Hydroponic System?
This method offers many advantages compared to traditional gardening:
Ultra-space efficient
A single vertical tube can grow 20–40 plants.
Saves up to 90% water
Water recirculates, so nothing is wasted.
No soil, no mess
Perfect for indoor and balcony gardeners.
Fast plant growth
Hydroponically grown plants grow 30–50% faster.
Low-cost
No need to buy pots, soil, or big containers.
Eco-friendly
Uses less water, less plastic waste, and fewer chemicals.
Fewer pests and diseases
No soil = fewer problems.
This is especially beneficial for city gardeners or anyone with limited space.
Best Plants for a Vertical Hydroponic System
Not all plants thrive vertically, but many do exceptionally well.
Leafy Greens
- Lettuce
- Spinach
- Kale
- Swiss chard
- Bok choy
- Mizuna
- Mustard greens
Herbs
- Mint
- Basil
- Coriander
- Parsley
- Oregano
- Thyme
Small Fruits
- Strawberries
Compact Vegetables
- Pak choi
- Baby romaine
- Dwarf bok choy
Avoid large root vegetables like potatoes, carrots, or full-size tomatoes, which require more space and soil.
Materials Needed (Low-Cost & Easy to Find)
You can create your own vertical hydroponic garden with simple items:
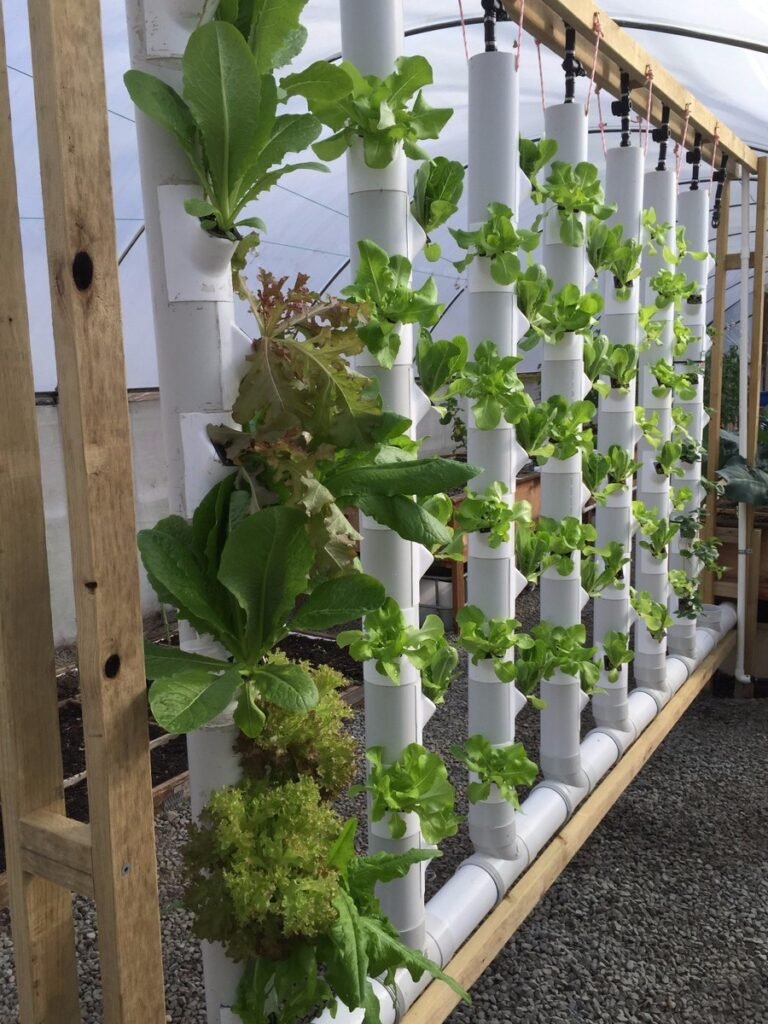
4-inch or 6-inch PVC pipe (3–5 feet tall)
The main growing tower.
1 submersible water pump
For circulating water from the reservoir.
Water reservoir (bucket or tub)
Placed at the base.
PVC elbows and joints
To connect the pipe to the pump.
Drill machine with hole saw
For making planting holes.
Hydroponic nutrients
Liquid or powdered.
Growing medium (optional)
Coco chips, rockwool, or sponge pieces.
Tubing
To carry water from pump to top.
Net cups or simple openings
Plants will grow directly through holes—no pots.
This setup is incredibly customizable—you can build a small or large tower depending on your needs.
Step-by-Step: Build an Easy Vertical Hydroponics System Without Pots
Let’s go through the entire process from construction to planting.
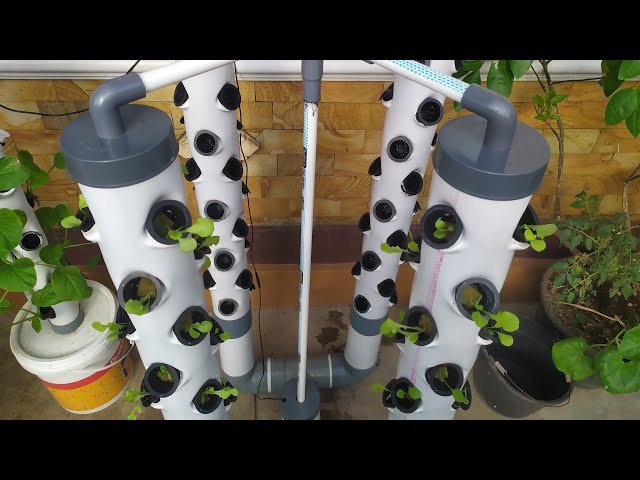
Step 1: Prepare the PVC Tower
Choose a strong PVC pipe (3–5 feet).
Mark holes 15–20 cm apart in a spiral pattern around the pipe.
Hole size:
- 1.5–2 inches diameter
- Enough for roots to expand
Use a hole saw attachment on a drill to create clean openings.
Sand the edges to make them smooth.
Step 2: Make a Waterflow System
Your vertical tower works by delivering nutrient-rich water from the top:
How it works:
- Water is pumped from the reservoir.
- It flows to the top of the PVC pipe.
- It trickles downward over the roots.
- Whatever isn’t absorbed returns to the reservoir.
This loop repeats continuously or at set intervals.
What you need:
- A submersible pump
- Flexible tubing
- A PVC cap for the top to distribute water
Drill small holes inside the top cap to create a “shower effect.”
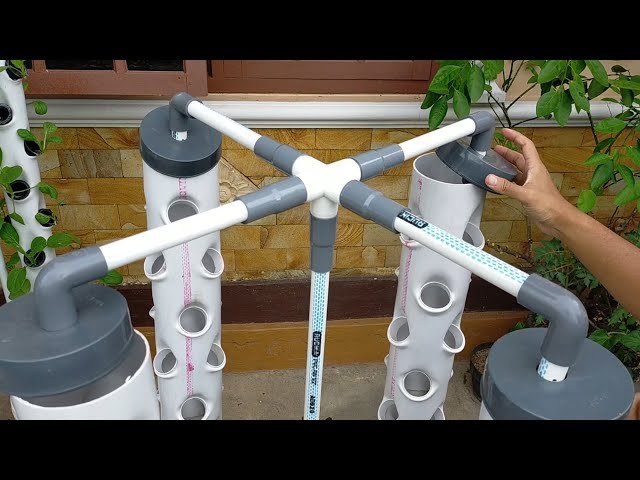
Step 3: Assemble the System
Steps:
- Place the reservoir (bucket) at the bottom.
- Fit the vertical PVC pipe into a stable base.
- Connect the pump to the top of the pipe via tubing.
- Seal all joints to prevent leaks.
If you want an advanced version, add:
- A timer for automatic watering
- A second pipe for increased stability
- A filter to keep nutrients clean
Step 4: Add the Nutrient Solution
Fill the reservoir with water, leaving space at the top.
Add hydroponic nutrients according to the instructions.
Ideal pH: 5.5–6.5
Filling once can last 1–2 weeks depending on weather and size.
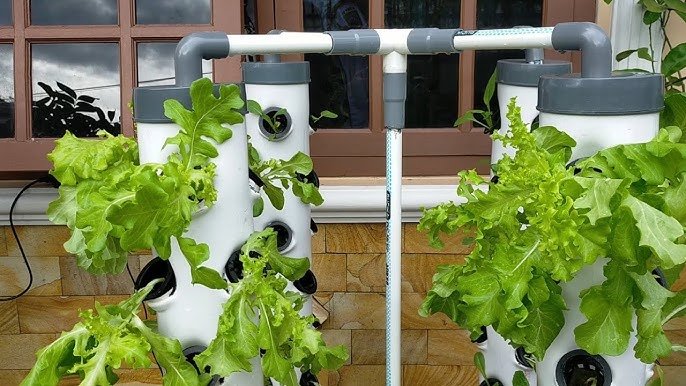
Step 5: Insert Plants Without Pots
This is the special part—no pots needed!
How to plant:
- Take seedlings grown in sponge cubes or rockwool.
- Gently place them through the planting holes.
- Ensure roots hang inside the pipe.
- Use a small piece of sponge to secure the plant if needed.
Roots will grow freely inside the tower and absorb nutrients directly.
Step 6: Turn On the Pump
Run the pump and check:
- Water flows to the top
- It trickles evenly down the pipe
- No leaks
- Roots are getting wet
If everything works smoothly, your hydroponic tower is ready!
Positioning & Light Requirements
Place your tower where it receives:
5–7 hours of sunlight
or
LED grow lights (indoors)
Leafy greens love indirect light, while strawberries prefer brighter spots.
Watering Cycle & Pump Schedule
Vertical hydroponics doesn’t need the pump running 24/7.
Recommended timer cycles:
- ON: 15 minutes
- OFF: 45 minutes
In hot weather, increase frequency.
At night, run only twice to maintain hydration.
This saves electricity and prevents root rot.
Nutrient Management
Hydroponic plants need balanced nutrients.
Use:
- NPK 10-10-10 or 15-15-15 (hydroponic grade)
- Calcium + Magnesium supplement
- Micronutrient mix
Replace nutrient solution every 2–3 weeks.
Check pH twice per week for stable growth.
Pest & Disease Prevention
Hydroponics has fewer problems, but watch for:
Aphids
Whiteflies
Root rot
Algae buildup
Use organic neem oil spray weekly.
Cover the pipe with a reflective material to block algae growth.
Harvesting and Replanting
You can harvest:
Lettuce — every 3–4 weeks
Herbs — continuously
Strawberries — every 2–3 days
Once a plant finishes its cycle, simply pull it out and replace it with a new seedling—no soil cleanup needed.
Tips to Maximize Yield
- Keep the reservoir cool (18–22°C).
- Add an air stone for better oxygenation.
- Shade the reservoir to prevent algae.
- Clean the tower every 2 months.
- Use strong, healthy seedlings.
The healthier the roots, the faster the plants grow.
Final Thoughts: A Simple, Modern Way to Grow More Food at Home
Building a vertical hydroponics system without pots is not just smart—it’s revolutionary. You can grow:
- More vegetables
- Better quality produce
- In less space
- With less effort
And you do it sustainably, using less water and zero soil.
Whether you’re a beginner or an experienced gardener, you’ll be amazed at how productive, clean, and satisfying this system can be. With a little creativity and basic tools, your home can become a high-tech mini farm producing fresh, healthy food all year long.