
The Java Apple—also known as Water Apple, Jambu, Wax Apple, or Rose Apple—is one of the most refreshing and fast-growing tropical fruits. Its crisp texture, juicy sweetness, and beautiful bell-shaped fruits make it a favorite among home gardeners. While growing Java Apple from seeds is possible, it often leads to unpredictable fruit quality and slow growth. Air layering, on the other hand, gives you a strong, productive plant that stays true to the parent tree and fruits much earlier.
If you’re looking for the easiest, most reliable way to grow your own Java Apple tree at home, this complete step-by-step guide will show you how to do it effortlessly—even if you’re a beginner!
Attractive Title
“Air-Layering Magic! Grow Java Apple Tree Easily from Cuttings Using This Simple Method (100% Success Guide)”
Why Air Layering Is the Best Way to Propagate Java Apple

Java Apple seeds can grow into healthy trees, but they rarely produce the same fruit quality as the parent. Seed-grown plants:
- Take 6–10 years to bear fruit
- Are genetically different
- Grow unevenly
- May produce sour or small fruits
Air layering solves all these issues because:
It produces a clone of the parent plant
Gives you fruits in just 2–3 years
Has a high success rate
Works perfectly even for beginners
Can be done almost any time in warm climates
This method allows roots to grow directly on the selected branch before detaching it from the tree.
Best Time to Air Layer Java Apple (Jambu)
Java Apple loves warm, humid weather. The ideal air-layering seasons are:
Late Spring
Summer
Early Monsoon
Avoid winter or dry months, as root development slows down.
Materials Needed
You don’t need anything fancy—just simple gardening tools:
- Healthy Java Apple tree
- Sharp pruning knife
- Cocopeat or sphagnum moss
- Garden soil or compost
- Rooting hormone (optional)
- Transparent plastic sheet or polythene
- Cotton rope, thread, or zip ties
- Water spray bottle
- Gloves
Step-by-Step Guide: How to Air Layer Java Apple
Step 1: Choose the Right Branch
To ensure successful rooting, choose a branch that is:
- 1–2 years old
- Pencil-thick or slightly thicker
- Healthy, green, and disease-free
- Exposed to good sunlight
- Not too young or too mature
The branch should bend slightly without breaking.
Step 2: Make the Girdling Cut
This is the heart of air layering.
Follow these steps:
- Select a point 1–2 feet below the branch tip.
- With a sharp knife, remove a 1-inch ring of bark completely around the branch.
- Scrape the green cambium layer gently to stop the bark from reconnecting.
- Ensure the wood remains intact.
The branch will now redirect energy into forming new roots at that spot.
Step 3: Apply Rooting Hormone (Optional but Effective)
Apply a thin layer of rooting hormone powder or gel on the exposed wood.
You may also use natural alternatives like:
- Aloe vera gel
- Honey
- Cinnamon
These promote faster rooting and prevent fungal infections.
Step 4: Prepare the Rooting Medium
Java Apple roots best in a moist, airy medium. You can use:
- 100% Cocopeat
- Damp sphagnum moss
- Garden soil + sand + compost mix
- Cocoa husk (traditional method)
Dampen the medium lightly. It should be moist—not dripping wet.
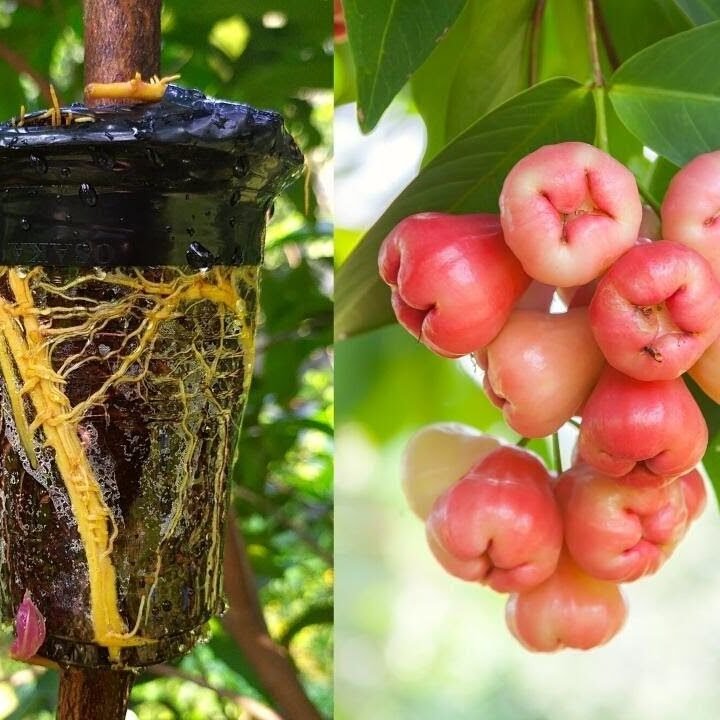
Step 5: Wrap the Air Layer
Now comes the exciting part!
- Wrap the moist medium around the exposed part of the branch.
- Cover it fully using a transparent plastic sheet.
- Tie both ends tightly using thread, rope, or zip ties.
- Ensure it becomes a sealed “rooting ball.”
Transparent plastic helps monitor root development.
Tip: Don’t let air pockets remain inside—roots grow best in compact moisture.
How the Air Layering Process Works
Inside the wrapped medium:
- Moisture stays trapped
- Cambium tissues activate
- Tiny root initials form
- Roots slowly expand into the moss
Java Apple roots much faster than many fruit trees, making this method ideal.
Root Development Timeline
Days 10–20:
Callus formation begins.
Days 20–40:
Thin root initials emerge.
Days 40–60:
Strong roots develop within the moss ball.
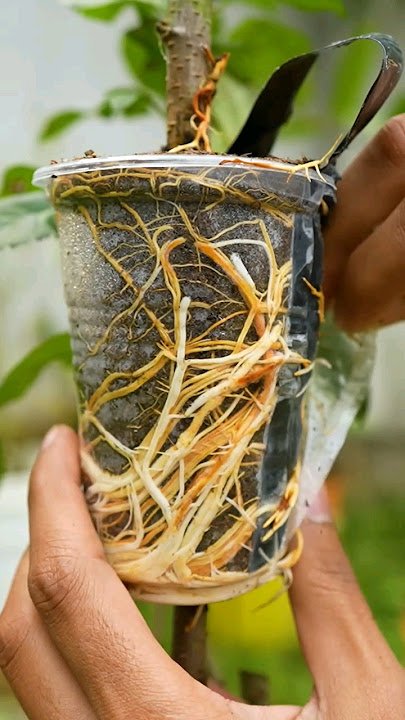
Days 60–75:
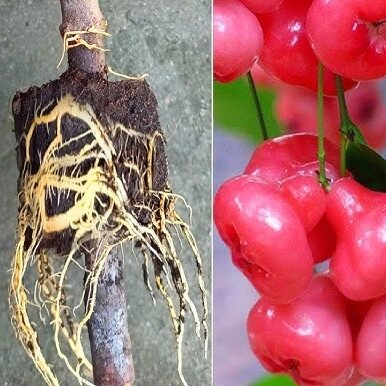
Roots become visible through the plastic wrap.
Once white or brownish roots are visible, the air layer is ready for harvesting.
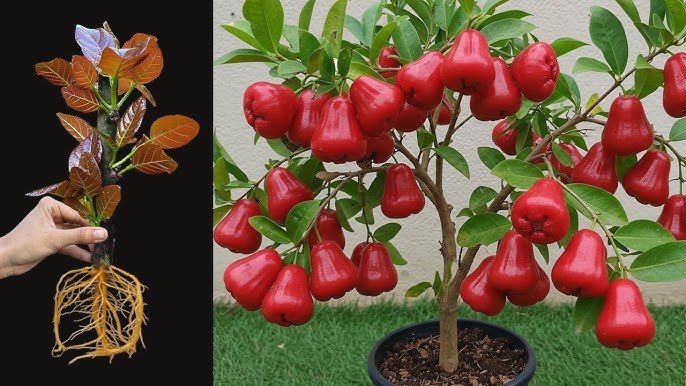
Step 6: Detach the Rooted Branch
After strong roots have formed:
- Cut the branch just below the root ball
- Use sharp pruners to avoid damaging roots
- Handle the new plant gently
Congratulations! You now have a baby Java Apple tree.
Step 7: Potting the New Java Apple Plant
Use a medium-sized pot with drainage holes.
Best soil mix:
- 40% garden soil
- 30% compost
- 20% sand
- 10% cocopeat
This ensures:
Perfect aeration
Good water retention
Fast root expansion
Plant the root ball carefully, covering it with fresh soil. Water lightly.
Step 8: Aftercare for the New Plant
This stage determines the long-term health of your plant.
Place in Shade
Give the plant 2–3 weeks in partial shade.
Light Watering
Keep soil moist—never soggy. Overwatering can kill young roots.
Add Mulch
Mulching with leaves or coco husk helps maintain moisture.
First Fertilizer
Feed compost or organic fertilizer after 40 days.
Avoid Direct Harsh Sun
Once stable, gradually shift to sunlight.
How Long Before a Java Apple Tree Fruits?
Air-layered Java Apple trees grow very fast.
Fruit-bearing time: 2–3 years
This is much faster than using seeds, which may take 7–10 years.
Your new tree will produce fruits identical to the parent:
- Size
- Taste
- Color
- Crunchiness
Common Mistakes to Avoid
Avoid these for guaranteed success:
Wrapping too loosely
Using dry moss
Using too much water
Exposing the air layer to direct sunlight
Cutting too deeply into the branch
Transplanting immediately after heavy rain
Following the correct method gives you over 90–100% success.
Benefits of Propagating Java Apple by Air Layering
Fast root development
Higher success rate
Identical clone of parent tree
Early fruiting
Grows well in pots or ground
Beginner-friendly method
Works in small spaces
Java Apple trees are also:
- Beautiful
- Evergreen
- Shade-giving
- Insect-friendly
Final Thoughts
Air layering is one of the most rewarding and reliable ways to grow Java Apple trees at home. Whether you have a garden, balcony, or terrace, this method gives you the power to multiply your favorite fruit trees quickly and successfully.
With the right branch, proper moisture, and a little patience, you will soon have a thriving Java Apple plant ready to bless your home with sweet, juicy fruits.